How to Enable and Disable Bash Ubuntu in Windows 10
On the Build 2016 event april 13 2014, Microsoft made a new innovation for the Developer, by adding native linux bash that you can actually run directly through Windows 10.
And since the release of the Build 14 316, you can run in Windows 10. Bash ubuntu linux There are many command-line that you can run like awk, grep, sed, and you also can run Linux tools such as Ruby, Python, etc.
Well in this tutorial. WinPoin will give way to activate and turn off the Ubuntu Bash features in Windows 10.
Note: To run this tutorial. Make sure you sign-in using the Administrator account.
Enabling Bash Ubuntu
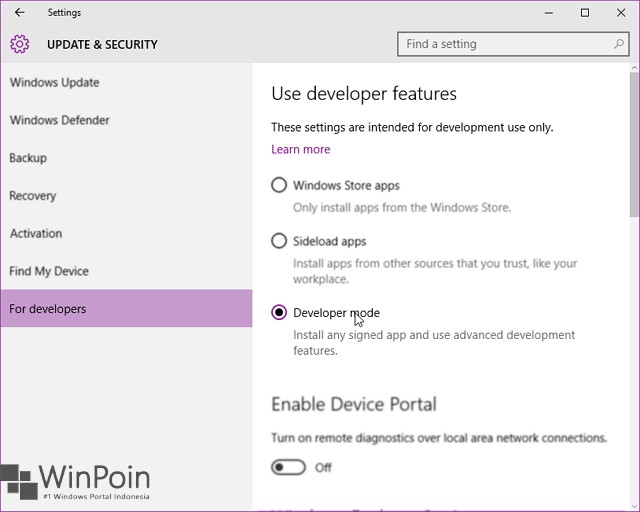
First go to Settings (Winkey + I), then navigating to Update & security - For developers. Then select the Developer mode.
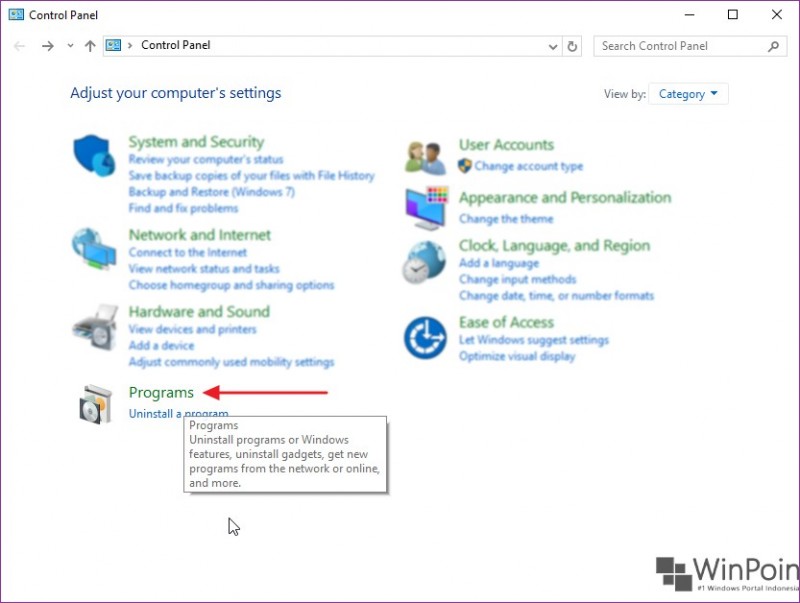
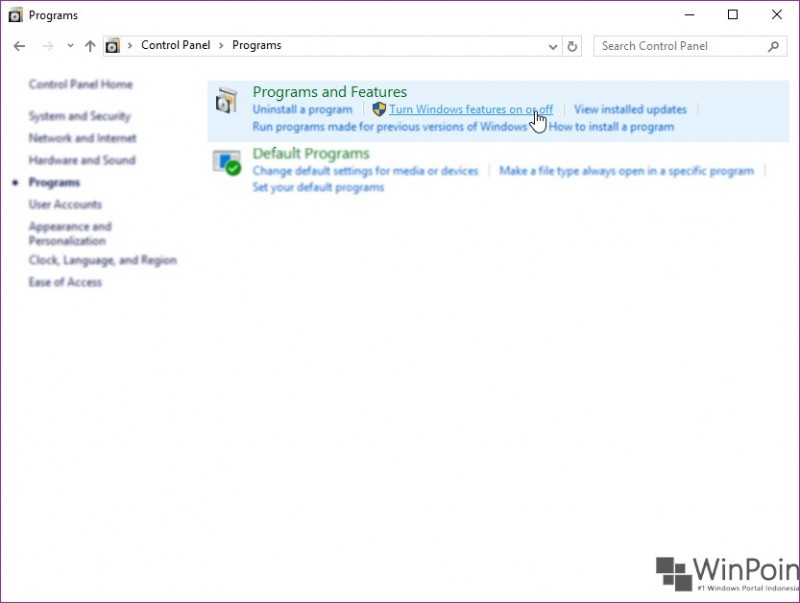
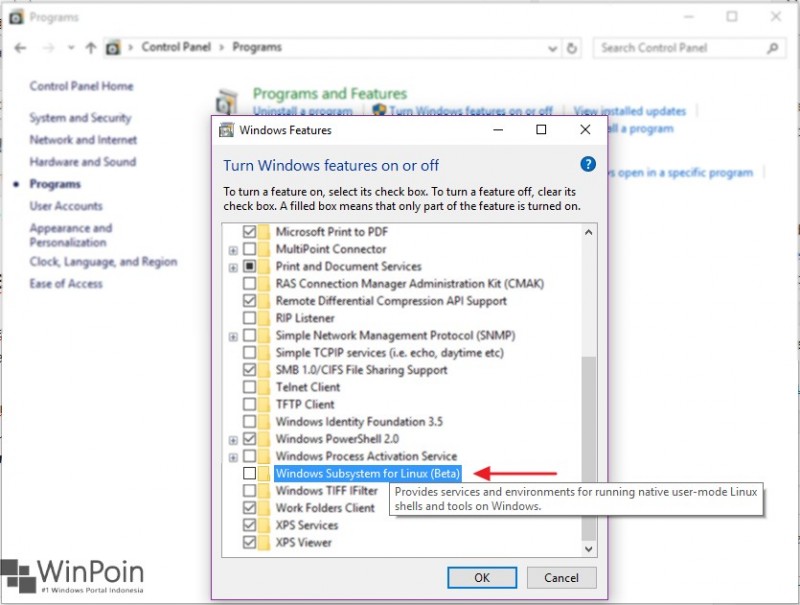
Next, open the Control Panel and navigate to his Program and Feature - Turn Windows features on or off.
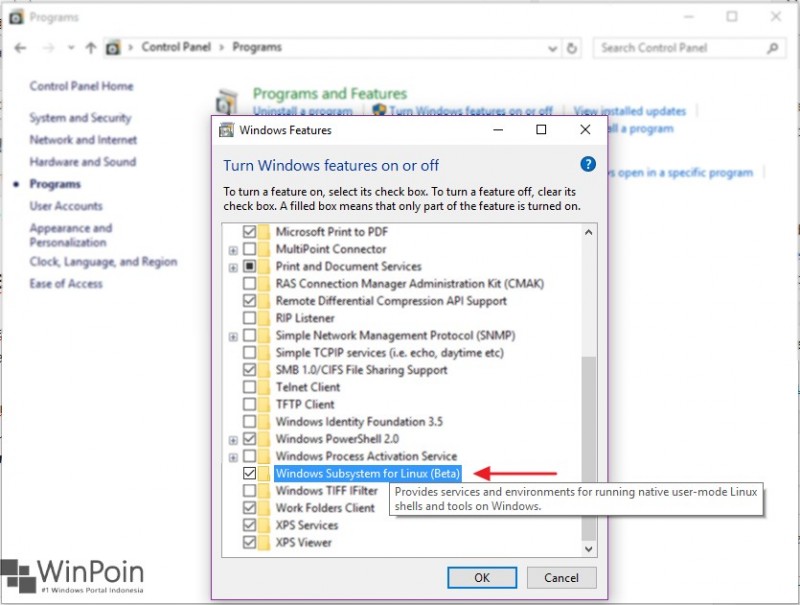
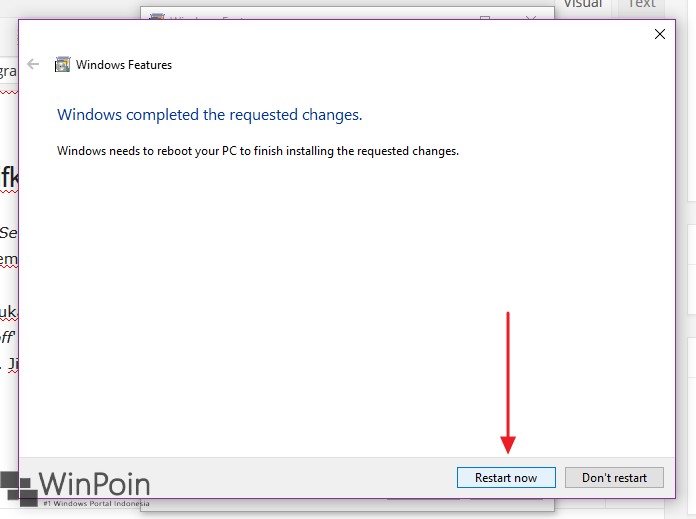
Then scoll down and then turn on the option Windows Subsystem for Linux (beta). If you already click OK. Wait a while until the process is complete, and you are asked to reboot the system.
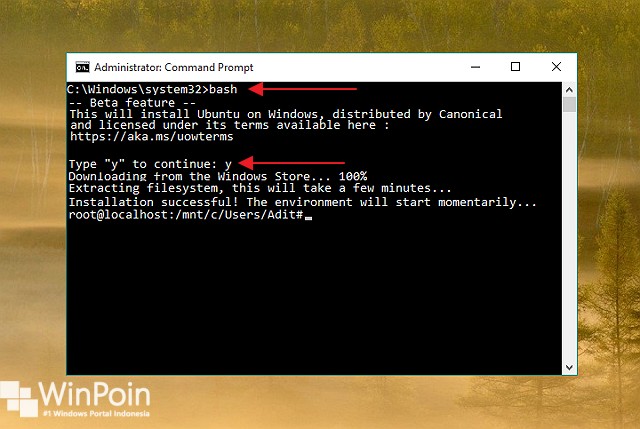
After re-login system, open a Command Prompt and typing bash commands and typing return Y. This step is to install bash on Windows. Wait a while until the process is complete (requires an Internet connection to download the file system bash). Once completed then you can directly operate.
Disabling Bash Ubuntu
To disable the feature Bash. The trick is to reopen the Windows Feature and then uncheck the Windows Subsystem for Linux (beta). Then reboot the system to save the changes.
download now