Showing posts with label to. Show all posts

Thursday, September 29, 2016

Easy way to get any WiFi pass using Android Phone

Easy way to get any WiFi pass using Android Phone


Theres a lot of android apps in Google Play store offering free wifi pass hack. But sad to say none of this are working! This apps will not give you the exact WiFi password. So is there any way to know your neighbors WiFi password? The answer is Yes! This is a simple old trick how to get your friend, customer or neighbor WiFi password.

Before you go to next steps, you must barrow the android phone of  the WiFi owner! Its up to you what the reason. For example: You want to know your friend WiFi Pass. You can barrow his android and tell him you want to Bluetooth or share it a file. something like that. Just use your brain how you can barrow his/her android phone.


Requirements:
  • Android Phone of WiFi owner
  • Root Browser (Download at PlayStore)
  • Common Sense
Note:
Oh I forgot! Android Phone of  the WiFi owner must be rooted, if not use kingroot to root it quickly.


Tutorial:
  • Open Root Browser
  • Tap on Data

Hack WiFi password
  • Open misc folder
Hack WiFi password
  • Open WiFi
Hack WiFi password
  • Open wpa_suplicant.conf
Hack WiFi password
  • Choose Open with...
Hack WiFi password
  • Tap RB Text Editor
Hack WiFi password
  • Now you will see WiFi Password
Hack WiFi password
  • Done! You can now CONNECT


Disclaimer: This post is for educational purpose only, we are not responsible for any damage or loss on your part.


also read - How to know your neighbors PLDT WiFi Password

download now

Read More

How To make A PiZZa !!!

How To make A PiZZa !!!


How To MAke A PiZZa!!!


Very Easy And Simple Isnt it???

 see video Here!!!

http://sniidevices.scrippsnetworks.com/0154/0154938_3.mp4

download now

Read More

How to download and play Pokemon GO if its unavaliable in your country

How to download and play Pokemon GO if its unavaliable in your country


Pokemon Go is currently officially available in New Zealand, Australia, United States, Canada and Germany. So, most of the Android and iOS users still dont have access to this game and we still dont know when it will be released in the remaining 200 or so countries filled with millions of more Pokemon fans. If you are impatient, there is actually a way to install and play Pokemon Go right now in countries where it is not available yet. Users in Brazil, Korea, Japan, India, Hong Kong, Nepal and more will be happy to try this method out. So if you are one of those Pokemon fans, who has been frantically searching Pokemon Go on Google Play Store or iTunes App Store  everyday, this post is for you.

Installing Pokemon Go on iphone and Android in unsupported countries


After the recent launch of Pokémon Go on iPhone and Android devices, it has take the world by storm. Pokemon Gos augmented reality gaming requires you to actually get out and search for Pokemon around your area and beyond. As your experience level increases you will be able to catch more powerful Pokemons, battle and take over your enemys teams and become the ultimate Pokemon Master. The game is highly addictive and like most Pokemon fans you too will be saying "gotta catch em all". The success of this game has skyrocketed Nintendos stock prices and now its worth billions of dollars more than before.

The direct installation method is easy. You just have to download the apk installation file and directly install the game instead of via Google Play Store. Then simply open your game and you are good to go. Pokemon Go does require you to turn on GPS and mobile data, which is likley to drain your phones battery faster than usual. On the plus side, the mobile data usage seems to be very reasonable and less than most other apps and games.

How to Install Pokemon Go on any unsupported countries: Android

  • Download Pokemon Go Apk from here: Pokemon GO APK installation
  • Before installation make sure installation from unknown sources are allowed. To do this, go to Settings >> Privacy (or Security) >> Scroll down and tap on Unknown Sources to allow installation of apps from unknown sources.
  • Now go to downloads and tap on the apk file you downloaded in step 1 and install Pokémon Go.


Now open Pokemon GO and it will prompt you to turn on GPS. Turn on GPS and WiFI or mobile data. You can sign in by using your Google account. Next, select/edit your avatar and type your nickname. Now the game will start and the first thing you will see is your avatar on a map. The map is extracted from Google Maps so it will be the real map of your area. As you move, so will your character. You will most likely find a couple of Pokemons nearby right away. More Pokemons will be placed further away. You can check your map and start hunting Pokemon. An important tip: Play safe and responsibly, do not trespass others properties, do not go chasing Pokemons on the highway or in the middle of the street and do not jump off a cliff if you see a Pokemon there.  

How to Install Pokemon Go on any unsupported countries: Android

  • On your iPhone, logout from App Store. Go to settings >> tap "Apple ID" and sign out
  • Now from settings >> General >> Language and Region, set your region as Australia, USA ,Germany or any region where Pokemon Go is available. 
  • Open App store and search "Pokemon GO" and download it.
  • If you don;t see it, you have to create a new Apple ID. While creating new Apple ID, make sure that your address is that of New Zealand, Germany, USA, Canada or any address where Pokemon Go is officially available. You can even use this Fakenamegenerator tool to generate a bogus Personal info of a U.S resident. 
  • Now go back to  iTunes App Store and Pokemon GO will be available.

After Pokemon Go is officially released in your region, you can switch back to your original Apple ID.


download now

Read More

Wednesday, September 28, 2016

How to fix Warning Camera failed error in Galaxy S7 Edge S6 and S5

How to fix Warning Camera failed error in Galaxy S7 Edge S6 and S5


Barely after 2 months of purchase, my Galaxy S7 Edge got the “Warning: Camera Failed” error that would not allow me to take any photos. Every time I opened the camera app, the screen would go black and give the camera failed warning error. The 12MP, f1.7 lens on Galaxy S7 is one of the best smartphone cameras today and it can even replace your digital cam or even DSLR for normal
Error message after opening Camera app on Samsung Galaxy S7
everyday shots. So, I was bummed when this awesome camera stopped working. Fortunately, this isn’t a hardware fault but an Android software bug common among Samsung Galaxy smartphones. I have listed below all the methods to fix Warning camera failed error on Samsung Galaxy S7, S6 and S5 phones. The method are lined up in the order of their effectiveness as reported by users.

Solutions: Camera failed problem on Galaxy S5, S6 and S7 Edge – Samsung Galaxy Camera app troubleshooting


Method 1: Disable “Smart Stay” feature

Smart stay basically detects your face and keeps the screen on when you are looking at it. So, this isn’t really a feature you need because you can increase the screen on-time or simple tap on the screen to keep it awake. This feature seems to conflict with the camera app of Samsung devices resulting in failed camera error.

  • Go to Settings >> Display >> Turn off “smart stay”
  • Reboot your phone


Method 2: Reset settings:

Resetting app settings is the second most effective solution to camera failed error in Samsung Galaxy devices.

  • Go to Settings >> Scrool down and select “Backup and Reset”
  • Select “Reset Settings” >> Tap “Reset” (Do not select “Factory Reset”)

Now your Samsung app settings will be reset to default and this will fix the Warning: Camera failed error on your Galaxy S7 edge, S6 or S5 smartphone. After this method, you will also need to again add your saved Bluetooth devices and re-enter your Wi-Fi password.


Method 3: Clear data of the Camera app

The clearing cache and data is the most widely used method for fixing Google Play Store related error codes. This might also solve camera app errors.

  • Go to Settings >> Applications >> Application Manager
  • Select “Camera” >> Force stop >> Tap Storage >> Select “Clear Data”
  • Tap “Delete”

Now open the camera app and try taking a picture. If you still get the “Warning: Camera Failed” error message, proceed to the next method.


Method 4: Wipe Cache Partition

Another method to fix Android firmware issues after an update, is to “wipe cache partition” from bootloader.
  • Turn your phone off
  • Hold power key + home key + volume up at the same time to bring up the bootloader
  • Once you reach the bootloader menu, use the volume key to highlight “wipe cache partition”
  • Press power button to select that option.
  • Now reboot system

Hopefully the Samsung Galaxy smartphone camera failed warning will be fixed by one of the methods. If you have alternative solutions, drop us a comment below.

download now

Read More

8 Tips to Make Windows 10 battery last longer

8 Tips to Make Windows 10 battery last longer


Not liike the previous versions of Windows, Windows 10 was made to run optimally on mobile devices such as laptops, tablets, and hybrid.

No wonder if eventually there are a variety of features that you can use to make batteries laptop / tablet Windows 10 become longer. But unfortunately not all Windows 10 users take advantage of this feature.

For those of you who want to batteries laptop / tablet Windows 10 yours is longer, following these 7 tips you can practice:

1. Set Battery Saver
Battery Saver is a feature in Windows 10 that you can use to save battery laptop / tablet.

This feature will automatically manage power usage in Windows 10 so as to be more efficient.

Battery Saver will automatically turn on when the battery is below the percentage that you specify, and automatically turns off when the battery is more than that.

You can set what percentage of the minimum battery before the battery saver turns on automatically. The default is 20%, but you can increase this percentage if you often work in mobile and need to conserve battery power longer.

To change it you can open the Settings> System> Battery Saver> Battery saver settings> then scroll to the percentage that you want.
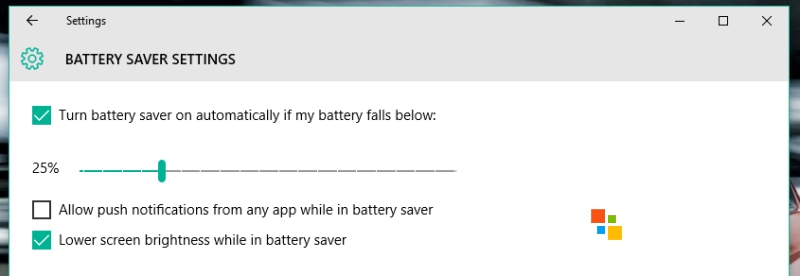


Make sure the checkbox Lower screen brightness while in battery saver participate checked.


2. Reduce Background Apps

Still in Battery Saver, click the Battery Use> Change background app settings> then turn off background apps that you never use.

Here I turn off the Groove Music, Get Office, Weather, and Xbox because they have never used it.
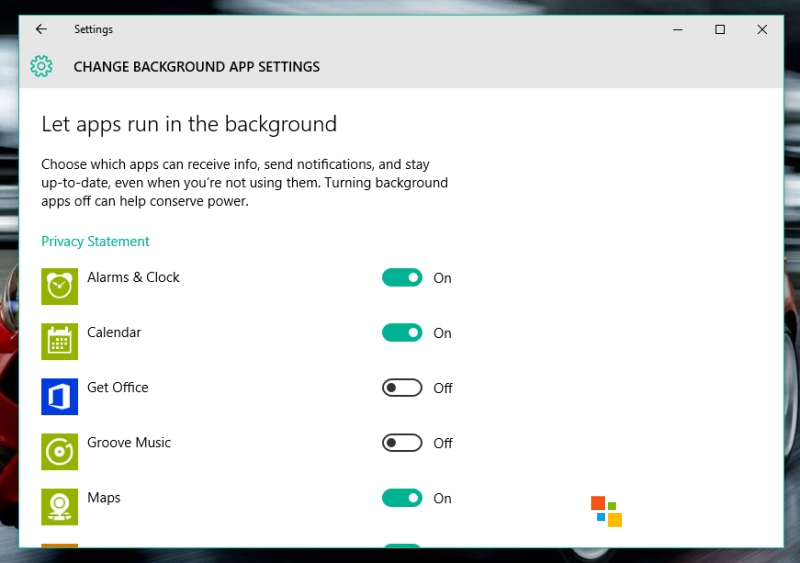


The more background app that you switch it off, the more battery saving laptop / tablet Windows 10 you.

In addition through the Battery Saver, these settings you can also access through Settings> Privacy> Background Apps


3. Set Power & Sleep

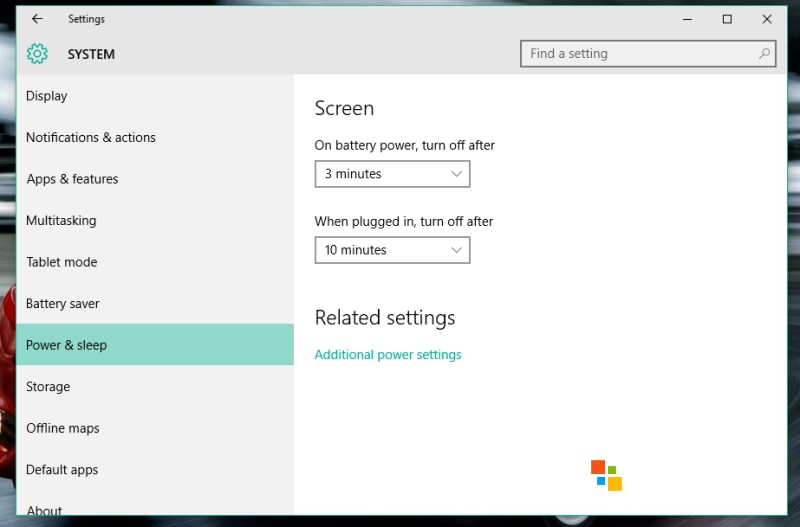
You can set how long the screen turns off automatically when the laptop / tablet in idle condition using the battery via the Settings> System> Power & sleep

It is important that the battery is not wasted to turn on the screen when youre not using.

Here I set the display will turn off automatically if within 3 minutes laptop I did not use.


4. Turn on Battery Saver & Change Power Plan If ..

When you:


  • Being outdoors
  • Away from the charger
  • Plans to use the laptop for long periods without charging
  • and other similar conditions

You can turn on Battery Saver although the percentage of battery power is still high.

I click the battery icon in the system tray, and switch Battery Saver manually with a click of a button.
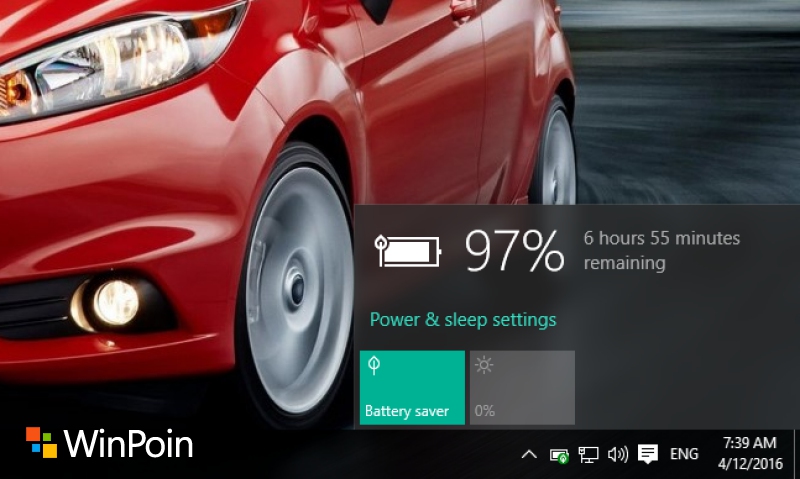


You can also change the power plan to Power Saver, by right-clicking the battery icon> Power Options> Change to Power Saver
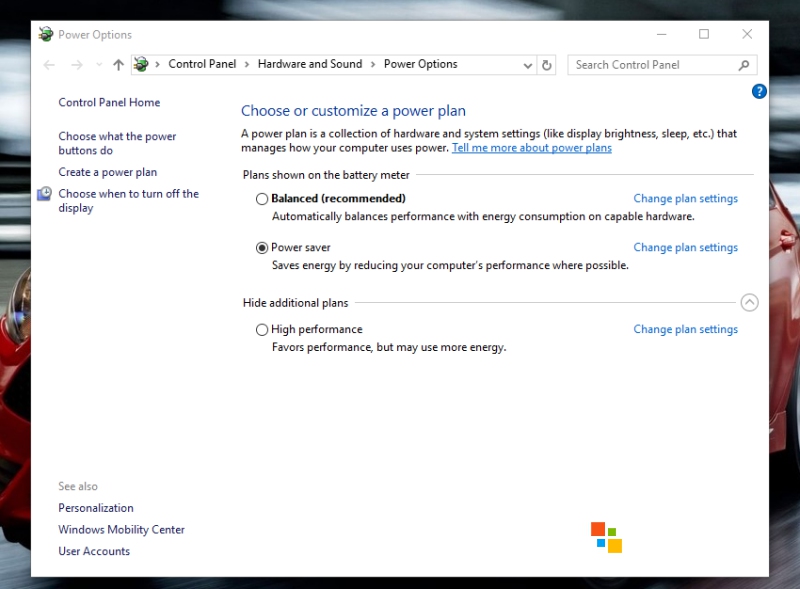

This is done so that you can use a laptop without charging in time as long as possible.

But you need to know that both of these will be affected to a decline in the performance of the laptop / tablet Windows 10, but it will maximize the durability of the battery during use.


5. Decrease Brightness

Its no secret that the screen is one component of a laptop / tablet which consumes a lot of battery power. Therefore if you are in need of maximum battery durability, lower the brightness on your screen.

But of course make sure brightness remains at a comfortable level for your eyes when using it.


6. Set Power Plan (Advanced)

Windows comes with several default power plan that you can modify, even you can create new ones from scratch.

Lets say you create a new power plan according to the conditions, for example Out of Home, At Work, etc; then customize the configuration according to your needs.

You can also modify an existing power plan.

To do this simply right click the battery icon in the system tray> Power Options> Change plan settings on the power plan you want to modify> Change advanced power settings

Well there you can set it manually, when Windows will shut down the hard disk when idle, paused jamming desktop background, saving power WiFi, etc.
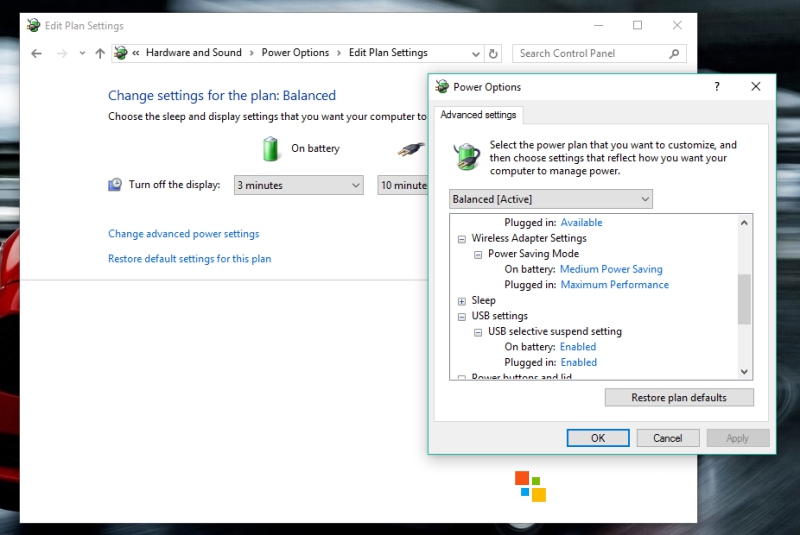


In many ways it is actually an advanced modification is not so necessary, but for those that want to, why not?


7. Reduce Startup Program

Startup program runs in the background, resource consuming, and of course participate consumes battery power.

Some software automatically inserts itself as a Startup Program, although it is not required.

Therefore, if it is a program you do not need to run automatically in the background, disable any of the Startup Program.

The trick is to right-click the Start Menu> Task Manager> Startup> and disable programs you need.
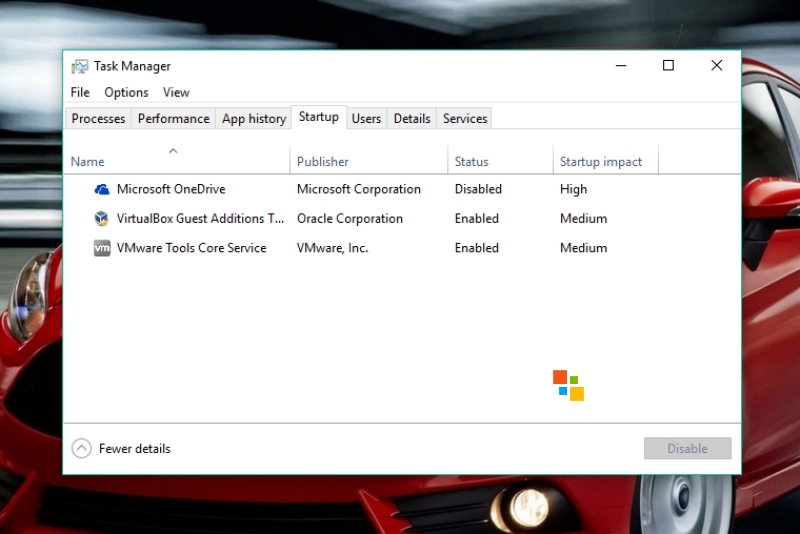

The more minimal running Startup Program, supported by the lack Background Apps above, the battery laptop / tablet Windows 10 you will be more durable.


8. For those who use Intel may set power settings so Maximum Battery Life can sometimes add up to 1-2 hours longer battery ??
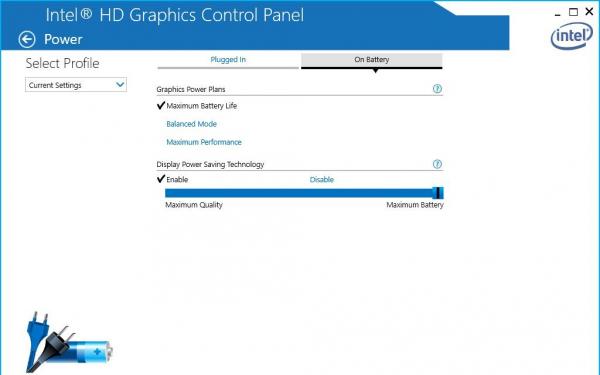


Thats 8 tips to make windows 10 battery last longer.

If you have other interesting tips, please share via the comments field below.

download now

Read More

How to know your Blackberry IMEI MEP ID

How to know your Blackberry IMEI MEP ID


Tutorial on how to see or how to know your blackberry phone IMEI #. This soft also help you to know your Blackberry MEP ID.

What is Blackberry MEP?
MEP ID is NOT your Unlock Code! The MEP is a serial number identifier of the operator (provider) of the Blackberry. 

Also read: How to Unlock any Blackberry

Blackberry IMEI Identifier

What you need:
  • Laptop or Desktop (PC)
  • Blackberry Phone
  • Blackberry Informations Reader Software (Download link) (Skip Ad)
Note: You computer must have blackberry drivers installed. If not, you can download BB drivers here.


Steps:
  • Connect your phone to the computer 
  • To read the MEP (MEP ID) and the IMEI of your BlackBerry 
  • Run the "Blackberry Informations Reader Software" 
  • Click "Read Phone" 
or you can simply press *#06# on your Blackberry Phone to know your IMEI #.

download now

Read More

How to Fix Error 505 in Google Play Store

How to Fix Error 505 in Google Play Store


The Error 505 is a Google Play Store error in Android 5.0 Lollipop and KitKat 4.4. Some apps affected by Error code 505 include Google Play Games, Asphalt 8, Hearthstone, The Walking Dead, Clash of Clans and so on. The fix involves running a simple ADB command in Android SDK, we will come to that later. Many got this error due to the Adobe Air app. So you can try uninstalling the app. This error has been fixed on the latest versions of Android Lollipop so you can also update your version of Lollipop to 5.1 or later to fix it.

This is actually a permission error so clearing cache method may not work. But you can still give it a try. First, clear the cache and data for Google Play Store and Google Service Framework. These methods are explained in detail here: RPC-S:7/RPC-S:5 and Error 963. If those solutions didnt help, try the steps below to fix Google Play Error 505 while installing or updating apps:

How to fix Error 505 in Google Play Store during app download


Method 1: Uninstall conflicting app(s)

If you have multiple apps installed to perform similar function, then the -505 error code maybe caused because those apps are trying to access the same system settings. For example- you may have multiple banking apps installed and both will try to use similar payment settings and protocols. And when these apps are conflicted error 505 is caused. To resolve this issue, simply uninstall the first app and use the other one and vice versa.

Method 2: Uninstall/Re-install

First completely uninstall all the apps that are getting this error in Google Play.  For example if your Blizzard apps are facing error 505, uninstall all of them and reinstall. Also, you may have installed some Android apps from the Amazon store- try uninstalling them and re-installing them via Google Play Store.

Error Formats:  
  • Unknown error code during application install "-505"
  • "Hearthstone: Heroes of Warcraft" cant be installed. Try again, and if the problem continues, get help troubleshooting (Error code: -505)
screenshot- (Error code: -505) while installing Google+ in Google Play

Method 3: ADB Uninstall


Before you begin the steps you have to install the Android SDK on your PC, connect your Android device and perform an ADB uninstall for the app package thats causing the error.

The ADB tool is inside the platform-tools folder inside Android SDK folder. You will have to open command prompt. For Windows users: Start>> in the search box type cmd >> right click and select "Run as Administrator"

From inside the command prompt,  navigate to Android SDK folder. Now you can run the ADB. uninstall command.

After youve installed the Android SDK and appropriate USB drivers follow these steps:
  • Perform an ADB uninstall for the app package thats causing the error.  App packages are in this format: com.xx.xx. You can check the app package name by going to Android >> data folder inside the internal memory of your Android device.  
    • For example to remove chrome package from your device, the command is: adb uninstall com.android.chrome.
running adb uninstall command in Android SDK
  • After successful uninstall you will see a message that says, "success"
  • Now reinstall or update the app (or game) from the Play Store


Hopefully the above step gave you some idea about how to fix this issue. If nothing worked you may have to factory reset your device. If you have a better solution for the unknown error 505 please let us know about it in the comments.

download now
Read More

Tuesday, September 27, 2016

How to fix error 501 on Google Play Store during download or installation

How to fix error 501 on Google Play Store during download or installation


Due to error 501 in Google Play Store Android users can’t install, download or update many apps and games on their Android phones or tablets. This problem is caused most of the time if you have multiple apps installations going on in the Play Store. In such case, cancel all the app installations and download them one by one. If you are a custom ROM user, you may get the 501 error code while updating Google Play Services. This is caused because you flashed an incompatible Gapps package or a buggy OS. In such a case, reflashing the OS + Gapps package could be the solution. In my case, the Google Play Store error code –501 popped up while installing an app update. Here are all the possible methods to fix Android error 501 in Google Play:

Android Fix: Google Play Error Code: -501

Google Play Store Error 501 while updating a Google app


Method 1: Reinstall

Simply cancel the installation process and try installing the app or game. If that didn’t fix it, uninstall the app/game completely and download it again from Google Play Store.

Method 2: Uninstall updates for Google play Services

This method will probably solve error 501 message while updating Google Play apps like Google Play Services, Google +, Google Play Games, YouTube, Gmail and so on.

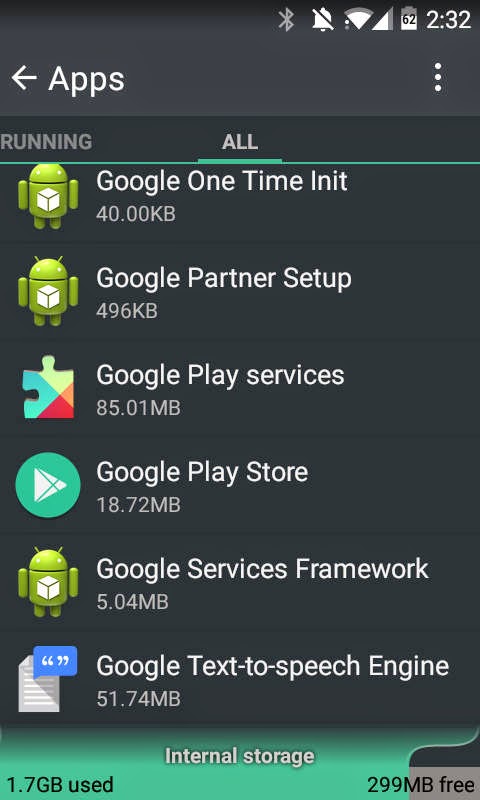
  • Go to Settings >> Apps >> All
  • Scroll and select “Google Play Services”
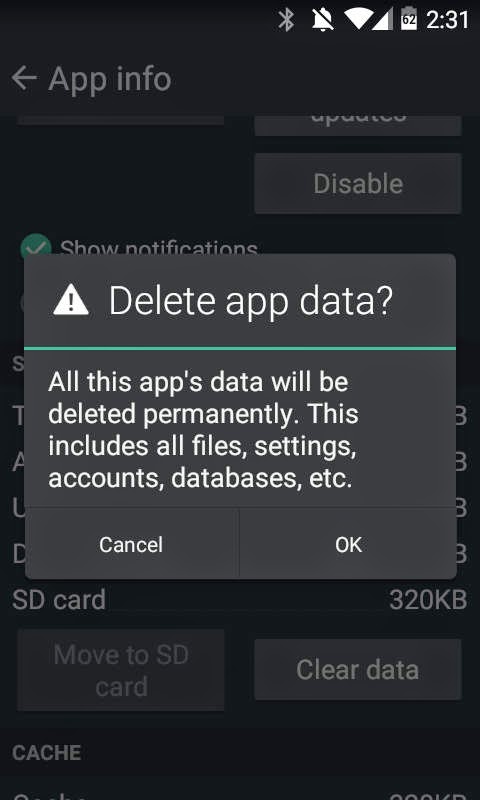
    • Tap “Uninstall updates” and “clear data”
  • Also,  select "Google Play Store" and tap "Uninstall updates"
  • Again, go to Apps >> All >> select “Google Service framework”
    • Tap “Clear Data”
  • Open Google Play and download or update an app


Method 3: Resetting App preferences

Resetting app preferences will restore default settings for your apps. This won’t delete any data from your Android device.

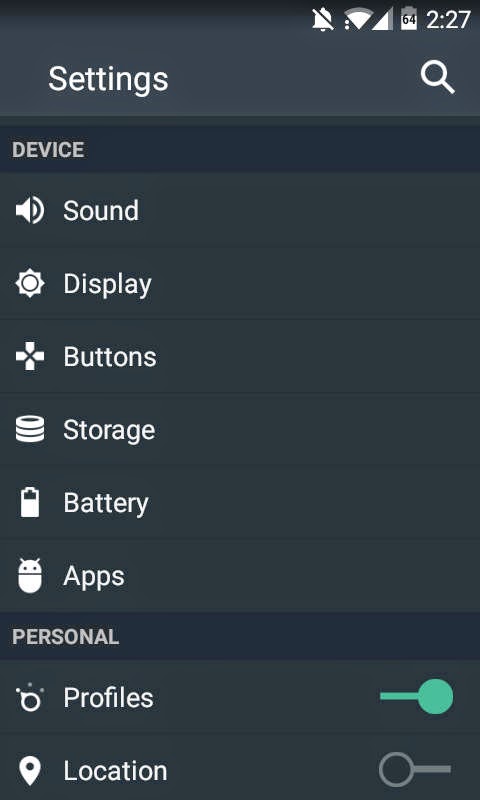
  • Go to settings >> Apps
  • Press menu or the three dots on the top right
  • Select “Reset app preferences” >> Tap “OK”


Method 4: For custom ROM users (Cyanogenmod, Paranoid Android, SlimROM etc)

First try reflashing your OS and then a compatible GAPPs package. Go to recovery and wipe cache partition. See if that solved the 501 error in Google Play. If that didn’t work, you will need to entirely wipe the device (factory reset) and then run a fresh installation. For the fresh reinstallation try a different ROM and a new Gapps package. Reboot into recovery and proceed to flash the new zip files. That will almost certainly fix the 501 error message while updating Google Play Services.


Thanks for reading. Hope one of the above methods fixed “Can’t download app due to error code -501” in Google Play Store issue. If you have alternative solutions please suggest them in the comments.

download now
Read More

How to Fix Error 500 in Google Play Store

How to Fix Error 500 in Google Play Store


Google Play Error 500 is an Android app download error that many Clash of Clans users are experiencing on their Android devices running older OS like 4.2 or 4.3 JellyBean. Relatively newer OSs like Android 4.4 KitKat and 5.0 Lollipop is also affected by this bug but not as widely as the older versions. Due to error 500 in Google Play Store, users cant download or update any Android apps. Sometimes this error code pops up during installation and even after the app has been completely downloaded. This is the exact format of the error message- "Clash of Clans" could not be downloaded due to an error (500).

Other apps affected by this Play Store bug includes YouTube, Facebook, WhatsApp, Viber and other apps. Normally this issue is caused by a slow internet connection so you can try waiting for your Wi-Fi to get back to its normal speed or you can try connecting to a different network. If the app youre , try downloading the app on mobile data.  Turn Wi-Fi off and turn it back on and try the installation. If that didnt fix  Error 500 in Google Play Store, then try the steps below:

How to fix error 500 in Google Play Store

Clash of clans game poster

Note: This fix works for any app or game causing error code 500.

Method 1: (For update error)
  • Sync Game data to Google Play Store (Settings >> Accounts >> choose ur gmail)
  • Totally uninstall Clash of Clans or any app thats causing error
  • Then reinstall it from Google Play Store


Method 2: Clearing Cache & Data
  • Go to Settings >> Apps >> swipe and go to "All" tab
  • scroll down and select "Google Play Store" >> Select "Clear Cache" and "Clear Data"
  • similarly, clear cache and data for "Google Play Services"
  • reboot (optional)
  • open Google play and try to download or update the app or game

Method 3: Remove and add back your Google account

This is a very common error fix used to solve Google play Error 927, Error 963, and Error 907.  In this method you will have to remove your Gmail account from settings >> Accounts >> Google >> press menu and select  "Remove account". After that simply adding the same account back will fix the app download/update error.


Let us know if the above steps fixed Google Play Store Error 500 in your Android smartphone or tablet. If you have any other solution or fix, let please drop a comment and help us out.


download now
Read More

LG releases software update to fix LG G4s low battery life issue

LG releases software update to fix LG G4s low battery life issue


Though an aging 2015 flagship, the LG G4 is a great smartphone and its only big weakness is its poor battery life, which is very short compared to many competing flagships of today.  The G4 is now available for less than $300 in many countries and that makes it a bargain phone for someone looking for a well-built smartphone with excellent camera, 2K resolution display and enough power for basic use as well as 3D gaming (todays standards). However, the G4s battery barely lasts 4 hours during video playback and with intense use you will get a little over 3 hours, which is quite low considering the G4 packs a large 3000mAh battery. Many expected the battery life to increase after Android 6.0  Marshmallow was released for the G4, but even the new "doze" feature couldnt improve G4s average battery life. Fortunately. G4 supports fast charging technology, which should juice it up from 0 to 100% in a little over 1 hour of time. 


There is good news for people who have been charging their LG G4 smartphone twice or more on daily basis. LG has released a software update today (June 10, 2016) that is expected to bring noticeable improvement to G4s battery life. So check for software update on your G4 and run the installation. Make sure you have at least 60% before you install the software update. 


If you have disabled auto update, Go to settings >> General >> scroll down and tap "About" >> Check for updates. 

download now
Read More

How to fix error 923 in Google Play Store

How to fix error 923 in Google Play Store


The Error 923 is a Google Play Store error which prevents Android users from updating or downloading apps and games. The error message looks like this: "Viber" could not be downloaded due to an error (923). Popular apps affected by this Google Play Store bug include Facebook, Clash of Clans, Hearthstone, Whatsapp and Subway Surfer.  While I’m not sure what Android error code 923 exactly means, in order to fix it, you will use the cache clearing method, which has been used to solve other common Android market errors like RPC:S-7 and the infamous “unfortunately app has stopped error”. Users will keep getting this error until they clear the cache and data for some Google processes. Here are a couple of fix for Error 923 in Google Play Store:


Similar Error: Fix Android Error 924 on Google Play

How to Fix Error 923 in Google Play Store 

First Method : Clear Google app cache


Clearing App Cache to fix 923 error in AndroidClearing App Cache for Google Play Store


  • Go to Settings >> Apps >> Swipe left to see “All” apps list
    • Scroll down and select “Google Play Store” 
    • Select “Force stop” and then “Clear Data” >> Select “Ok”
  • Go to Settings >> Apps >> Swipe left to see “All” apps list
    • Scroll down and select “Google Play Services” >> 
    • Select “Force stop” and then “Clear cache” >> Select “Ok”
  • (optional) Again go back to “All” app list 
    • Scroll down and select “Google Play Framework” >> 
    • Select “Force stop” and then “Clear Data” >> Select “Ok”


Once above steps are completed, open Google Play Store, add you Gmail account information and start downloading apps and games.

Second Method: Clear System Cache

Android_Settings
Clearing System Cache to Fix error 923 in Android Play Store


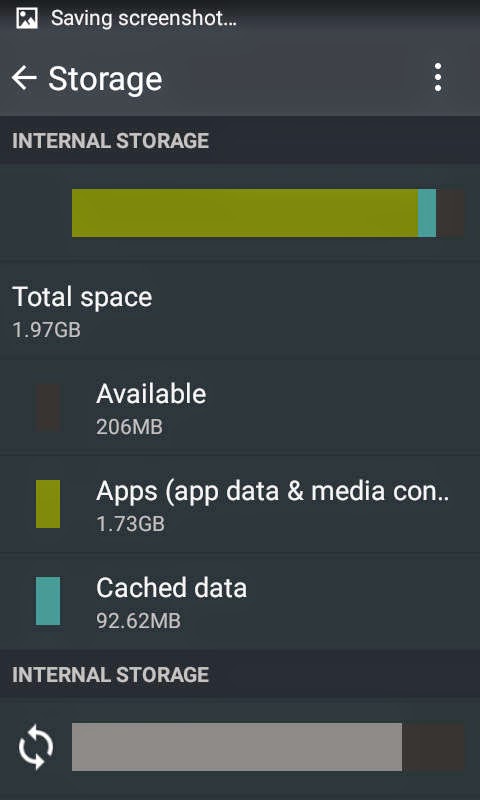
  • Go to Settings >> Storage
  • Tap on “Cached Data” under Internal Storage
  • Press “OK” to clear cache
  • Now reboot and try to install the App from the Google Play Store


I hope the above solutions helped resolve this error for your Android Smartphone or tablet. If you have any other 923 error fix, please mention them in the comments.


Note that this error is common mostly in the Jelly Bean operating system so if you update to the latest Android 4.4 Kit Kat or Android 5 Lollipop, you may stop getting this error. Some devices which have been affected by the 923 error include Moto G, Samsung Galaxy S5, Galaxy S4, Galaxy S3, Galax S2, Nexus 4, Nexus 7, HTC One X, LG L5.  Many users have complained of the 923 error while to download Whatsapp, Facebook, Blackberry Messenger etc.


download now

Read More

Monday, September 26, 2016

How to shoot RAW photos in LG G4 G3 G5

How to shoot RAW photos in LG G4 G3 G5


The best feature of LG smartphones like G4 and G5 is its camera, and what makes it special is its ability to shoot photos in RAW format. Taking pictures in RAW will give photo editors incredible amount of control to tweak their images and improve its overall quality via powerful editing tools like Adobe Lightroom. Many new LG smartphone users have a hard time finding the option to enable RAW mode in LGs camera app.

To enter RAW mode, you will first have to switch from automatic to manual camera mode. This is very easy, simply open your camera app and then tap in the menu icon (three dot vertical line) on the top left. Now, tap "Manual". After youre in manual mode, on the left taskbar you will see a "JPG" icon. Tap on it and now it will switch to "RAW JPG".  Now you are ready to shoot photos in RAW format.
Switching to manual mode

LG G4/G5 Camera app RAW shooting mode
Enabling RAW JPG shooting 
Before you start using the RAW mode, you should learn the basics of manual shooting. It is very easy to learn. Just play with the available settings that include WB(white balance), MF(manual focus), exposure (+/-), ISO and shutter speed (S). On brighter environment you will need to lower the ISO and the shutter speed. On a more darker setting or dimly lit indoor environment, experiment with higher ISO and lower shutter speed. Too much ISO, while brightens the image, can increase noise. Note that when you increase the shutter speed, your cameras shutter will open for a long time to let more light in and takes more time to snap a photo. So you will have to hold the camera very steady while shooting with low shutter speed. The white balance is used to change the color tone from cool to warm- use it to get the most natural color for your photos during different weather and lighting conditions.


The LG G4 and G5 with its f 1.8 aperture camera, is able to take excellent night shots. You can take amazing night shots by using a small smartphone tripod. Just play with the manual settings and you will become a pro LG smartphone photographer in no time.  

download now

Read More

how to create wifi using command prompt

how to create wifi using command prompt


how to create wifi using command prompt 


Guide video link is here https://www.youtube.com/watch?v=E3wYZeUMjOY
how to generate a Virtual WIFI router using CMD ,

First- Run notepad using winkey + R then type notepad or  type notepad in start menu  ,Paste the following code into it
( Note- password must be atleast 8 characters long )

netsh wlan set hostednetwork mode=allow ssid=My  wifi key=password
netsh wlan start hostednetwork

Second-save this file as wifi.bat  , its imp to save the file with .bat extension

third- turn on the wifi adaptor using inbuilt wifi switch

fourth- Run this file as an administrator , this can also be made permanent by changing properties of wifi.bat always run the file as administrator

fifth share the internet connection to the virtual wifi router thus generated.

well you got the new wifi named My  wifi in your room , connect to it using the Key password

to stop the wifi generate another bat file using the code 

netsh wlan stop hosted network

save this file as stopwifi.bat
run the file as administrator


Watch this simple video for help


PLEASE LIKE AND SUBSCRIBE MY FIRST VIDEO 
HACKER SACHIN RASTOGI

download now

Read More

How to backup your Android home screen layout setting

How to backup your Android home screen layout setting


Many Android users spend a lot of time setting up their smartphone or tablets desktop with useful widgets and quick access folders for different category of apps. However, this desktop layout/design will get lost if you or someone accidentally changes it. Then youll have to again spend time putting those items on the desktop. The feature to save the home screen layout isnt inbuilt on Android devices so users will have to use a third party launcher app like Nova, APEX, GO etc instead which provide such desktop backup/restore feature. Below are the steps on how to backup your Android desktop layout using NOVA launcher:


How to backup desktop layout in Android smartphones & tablets

  1. First, install Nova launcher and activate it
  2. Next, Add widgets, folders etc and design your desktop the way you like
  3. Now open Nova settings >> "select Backup & import settings"
  4. Tap on Backup and select a storage location.

Back and Restore Desktop layout in Android

Backup location Nova launcher


Now your desktop is backed up and whenever you need to restore it simply follow the above steps to restore your desktop settings. Nova also allows you to import the desktop layout from another launcher.


download now

Read More

How to fix android process media has stopped error

How to fix android process media has stopped error


The process android.process.media has stopped error affects android devices that have recently undergone some sort of firmware upgrade. This is not a major error because it doesnt affect normal functions but it can be annoying because it constantly pops up and you have to force close it. It is more common among users of custom ROMs like Cyanogenmod. Many have also got this error after restoring their apps via Titanium Backup. The obvious fix is to factory reset your device but that is a last resort. There are several other methods you can try to fix android.process.media has stopped error. Here are some of the solutions:

How to fix error android.process.media has stopped 

The process android.process.media has stopped unexpectedly. Please try again.


Method 1: Clear date of Media Storage

The data clearing is the most common method used in resolving many types of android error.
  1. Go to Settings >> Apps >> All
  2. Scroll down and select "Media Storage"
  3. Press "Force close" and select "Clear Data".
  4. See if the error message stops

Method 2: Move apps to internal storage or try a different SDCard

This android.process.media has stopped can also be caused if you have recently installed some apps installed inside your SDCard. Move the app to internal storage by going to Settings >> Apps >> All >> Select the app and select "move to internal storage" or "move to phone".  See if the problem is resolved. Also try uninstalling and reinstalling the app.

Sometimes the problem can be caused by a faulty sdcard. Check your SDcard for error in your PC. You can use the built-in disc management utility in your PC.  If that doesnt solve the error, try a different SDCard.

Method 3:   Clear dalvik cache and fix permissions

This is for custom ROM users who have clockworkmod recovery installed in their rooted Android smartphones or tablets.
  1. Power off device and boot into recovery (press volume + power key)
  2. go to advanced >> dalvik cache
  3. make the selection and press ok
  4. go back and also select "fix permission" if you have the option

Method 3: Clear data for Google Service Framework  and Google Play
  1. Go to settings >> Apps >> Swipe left and select "All" tab
  2. Scroll down and select "Google Service Framework" and select "Clear Data"
  3. Again, from "All" >> select "Google Play Store" and select "Clear Data"
  4. Before going to next step make sure you have moved everything from the download folder to a another location or external SDcard.
  5. Again, from "All" >> scroll down and select "Download" or "Download Manager" and "Clear Data".


Let us know if the above methods resolved the error on your Android Device. If you have any other suggestions/fix please post it in the comments.


download now

Read More

How to download Video from Youtube without IDM Inernet Download Manager

How to download Video from Youtube without IDM Inernet Download Manager


Today i will tell you guys how to Download Videos from youtube without IDM/Internet Download Manager!!! its easy...


Thats how you can do it!!!


download now

Read More