Showing posts with label fixed. Show all posts

Wednesday, September 28, 2016

One or more network protocols missing FIXED Windows 10

One or more network protocols missing FIXED Windows 10


The one or more network protocols missing is an error message that appears after you perform network connection troubleshooting on Windows 10. Many users will troubleshoot their wireless or Ethernet connection after getting “the connection has timed out” error while loading up a webpage on their browser. This is a protocol or network connection related issue while many think it is a Chrome or Firebox browser error. Here are the possible methods to fix one or more network protocols missing Windows 10 error:


Method 1: Reset winsock

  1. Press the windows button (key)
  2. Type “cmd” in the Windows search bar
  3. Right click on “Command Prompt” and select “Run as Administrator”
  4. Type netsh winsock reset >> Press Enter
  5. Type netsh int ip reset >> Press Enter
  6. Exit command prompt

Restart PC and try to open a webpage on your browser.

Method 2: Install Protocol in WiFi/Ethernet network settings

  1. Press windows key and type Control Panel in Windows search bar
  2. Go to Control Panel >> select Network & Sharing Center
    • Or search “network and sharing” in Control panel
  3. On the left side, click on “Change adapter settings”
  4. Right click on your active network connection (Wi-Fi or Ethernet LAN)
  5. Click on “Properties”
  6. Click on “Microsoft Network Adapter Multiplexer Protocol”
  7. Click “Install” >>Select “Protocol” >> Install “Reliable Multicast Protocol” (or any other protocol you find there)
  8. Select “OK”
Fixing One or more network protocols missing error


After installing the Protocol for their networks, many Windows 10 users have solved the One or more network protocols missing error.

Method 3: Automatically obtain DNS server address

If you have manually assigned the DNS server address, then simply setting it to automatic may resolve the network protocol missing error.
  1. Click Start button or windows key on your keyboard
  2. Type “Control Panel” in the search bar and then open it
  3. Now select “Network and sharing center” (you can search for “Network and sharing” in control panel)
  4. On the left, select “change adapter settings”
  5. Right click on your active network connection (Wifi or LAN) >> click “Properties”
  6. Under the Networking tab double click Internet Protocol Version 4 (TCP/IPv4)
  7. Enable Obtain DNS server address automatically >> Click Okay
  8. Similarly set DNS server address to automatic for Internet Protocol Version 6 (TCP/IPv6)
Obtain DNS server address automatically


Let us know if the above methods fixed the protocol missing error on your Windows device. If you have other solutions drop a comment.

download now

Read More

Sunday, September 11, 2016

Fixed DNS Probe Finished Bad Config error in Chrome

Fixed DNS Probe Finished Bad Config error in Chrome


I got the DNS Probe Finished Bad Config error on Chrome browser some days after I fixed another similar error- DNS Server Not Responding. This error also affects other browsers like FireFox, Edge but you get the error in a different format. When this error happens, you will have to refresh the web pages several times before it loads properly. Then it again stops loading and then you will have to refresh it again and again. Bloggers have posted numerous fixes for the Bad config error, but not all have worked for everyone. I tried a number of solutions myself but none of them were very effective i.e. they worked only temporarily. Then I decided to try something myself. Guess what? I managed to fix this error quickly and almost permanently- because I fixed it three days back and I am still not getting the error on my PC. Follow method 1 and 2 to fix the dns_probe_finished_bad_config error in Windows 7. 8.1, 10 or any Windows system:

How to fix DNS_PROBE_FINISHED_BAD_CONFIG error in Chrome

Also used to fix DNS_PROBE_FINISHED_NO_INTERNET error 

Disabling Network Connection in Windows 10
Network and Sharing center- Windows 10

Method 1: Flush DNS (Common Fix)

  1. Press Windows key and type “cmd” in the search bar
  2. Right click "Command Prompt" and then select “Run as administrator”
  3. type ipconfig/flushdns
  4. press enter
  5. Now close command prompt 
  6. Open Chrome and try to open a webpage


Method 2: Disabling/renabling network connection

Not sure if steps 1,2 and 3 are necessary but I tried them in this order:
  1. Press Windows key and type “cmd” in the search bar
  2. Right click "Command Prompt" and then select “Run as administrator”
  3. Run this command: netsh int ip reset (reboot)
  4. Open Google Chrome >> go to Settings >> History >> Clear browser history "from the beginning of time". 
  5. Now Go to Control Panel >> Network and Sharing Center (can also be accessed by right clicking on the Wi-Fi or network icon on the bottom right task bar)
  6. Click “Change adapter settings” (on the left side)
  7. Right click on your Network Connection and then select Disable
  8. Again right click on your network connection and select Enable
  9. Now connect to your Wi-Fi or LAN. You may need to enter your password. 
  10. Open Chrome and try opening a webpage. 
The above methods wonderfully worked for me and solved the DNS Config error in a flash. Let me know if my fix worked for you as well. If you are still getting DNS Probe Finished Bad Config error, also try the methods on this post: How to fix DNS Server Not Responding error in chrome browser.

download now

Read More

Thursday, September 8, 2016

Fixed DF DLA 11 DF DLA 12 error in Google Play Store

Fixed DF DLA 11 DF DLA 12 error in Google Play Store


Error retrieving information from server [DF-DLA-11] [DF-DLA-12]. Both of these Google Play Store errors pop up during app installation and specially during an app update. The first thing youd want to check is your internet connection. If your internet connection is too slow it may return the above errors. Also restart your phone or tablet and see if that fixed these Google Play errors. If the issue is still unresolved, fear not, this post has several easy solutions for these errors.


Another reason these errors pop up is if you have too many large size apps updating at once. In such case,  it is recommended that you update your apps one by one in Google Play Store. If the problem still persists, here are some possible ways to fix error retrieving information DF-DLA-11 and DF-DLA-12 errors in Google Play Store:

Screenshot showing Google Play update error[DF-DLA-11


Screenshot of Google Play Store download error DF-DLA-12


Method 1: Clearing Google Play Store app data

This solution involves clearing data for Google Play Store and Google Service Framework. This is the most used error fix on Android devices. It will come handy for other Android error codes as well.
  1. Go to Settings >> Apps >> All
  2. From the app list, select "Google Play Store"
  3. Tap "Clear Data"
  4. Again, from All >> select "Google Service Framework" >> "Clear Data"
If the error message is still popping up, also uninstall Google Play Store updates by navigating to Settings >> Apps >> All >> Google Play Store >> "Uninstall Updates". 


Method 2: Resetting app preferences

This is the second most effective solution for Google Play server errors. You will resetting your the settings of all of your apps and games. Note that this method wont remove data, multimedia files, login info or save games from your device.

Go to Settings >> Apps >> Press Menu or the three dots on top right >> Tap "Reset app preferences"

Method 3: Clear App Data 

While your app is installing or updating, cancel it by taping on the "x" icon. Now run the installation
once more. If you still getting the DF-DLA-11 error for a particular app, uninstall the app completely and then re-install it via Google Play Store. If its a system app, you wont be able to uninstall it, so youll just have to clear its data. To clear app data:
  • Go to Settings >> Apps >> All
  • Scroll down and select the app that you are unable to update or install due to this error
  • Tap "Force Stop" >> "Clear Data"
  • Open Google Play and update the app

Method 4: Connect to a different network

Firstly, turn off your router and turn it back on after 30 seconds. A lot people may get server errors because of temporary connection slowdown, and in such cases you may need to reset your router. Connect to Wi-Fi and see if you still get the DF-DLA-12 error while updating your app or game in Google Play.If you are connected to your Wi-Fi, switch to mobile data or a different Wi-Fi network and run the app update/installation on Google Play. The error may have been caused by a faulty network connection.

Method 5: Check your storage

Do you have a lot of apps installed? Maybe you have too many junk files. Try cleaning them up using apps like cleanmaster. You can also uninstall apps or games you rarely run.

    Final solution: Delete Google account 

    On this method, you will delete your Google account from settings and then simply add it back. This has solved many similar "error retrieving information from server" errors in Google Play store. The complete steps for deleting and adding your Gmail account on Android devices is mentioned here:  How to Fix Error 489 in Google Play Store.


    One of the above methods will likely solve this error and if you have any other fix for this Android error, please mention them in the comments. 


    download now

    Read More

    Wednesday, September 7, 2016

    Fixed My Place grayed out in LG smart settings

    Fixed My Place grayed out in LG smart settings


    For LG’s smart settings to work you have to turn on my place in the location settings. If you aren’t connected to mobile data your My Place option is greyed out and you can’t turn it on. So all you need to do is turn off Wi-Fi and swipe down from the screen to access the quick toggle and tap on “Data” to turn on mobile data. Once connected to mobile data, you the gray highlight will be removed and you will be able to turn on My Place under location settings.

    "My Place" option turned off and grayed out in LGs location setting


    There is however one more steps before you can use the smart settings features that will automate many features like turning on Wi-Fi and Bluetooth and changing sound profile when at home or office. After “My Place” is enabled you will need to locate your Home for smart settings. When you are at home, simply tap on “My Place” and the Maps will open and automatically detect your current location, which you can set as home address for the smart settings. If you are still confused, here are detail steps to enable or turn on My Place for using smart settings feature on LG smartphones like G4 and G5:

    1. First turn off Wi-Fi and enable Mobile Data (via quick access toggle on the notification bar)
    2. Next Go to Settings >> General >>Location >> My Place (it will no longer be grayed out)
    3. Turn on “My Place” and select “Allow”
    4. Next, you will have to set you home location
    5. Go to settings >> General>> Location >> Turn on location >> Tap on “My Place”
      • Note: Mobile data should be enabled for this step as well
    6. Now your current location will be automatically detected, and you can set it has “Home” location
    7. If you want to manually enter your home location, click on the gear icon and type your address.

    Turning on location access on Android
    Step 3: Allowing location access to "My Pace"

    "My Place" turned on for smart settings
    My Place is on

    Scanning home location via GPS and mobile data on Android
    Step 5: Scanning home location

    After these steps, you can go to Settings >> General >> Smart settings and turn on “When at home” and “When away from home” settings for automatically turning on/off your Bluetooth, Wi-Fi and change the sound profile when you are at home or away.


    download now

    Read More

    Thursday, September 1, 2016

    Fixed Mi Band not charging by Power Bank

    Fixed Mi Band not charging by Power Bank


    Ive found that Mi Band, the best selling low-price fitness tracker, has many bugs and incompatibility issues. The first bug was the Mi Fit Error 96013 that didnt let me sync my Mi Band 1S (pulse) with the Mi Fit app and the next one is an issue with charging. Now the Mi Band is not charging via my Mi Power Bank. When I connect the Mi Band to the power bank, the LEDs light up and blink to show that its charging, but after few seconds it stops charging because the powerbank turns off automatically. Alternately, you could charge it via a phone charger or simply connect the MiBand to your phone via OTG cable. However, there is an easy solution if you really want to charge your Mi Band fitness tracker via powerbank.


    How to fix Power bank doesnt charge Mi Band issue  

    Mi band connected to Power Bank but not charging
    Mi Band stops charging via Power Bank


    I have found that Mi Band is not compatible with any power banks because high capacity powerbanks detect it as fully charged.  The weird solution to this issue is to connect both your smartphone and Mi Band to your Power Bank. By doing so, your power bank doesnt go to sleep and will charge your Mi Band while its charging your phone. Mi Band has a tiny 45mAh battery so you wont have to wait too long for it to fully charge.

    Unfortunately, if you have only one USB port on your Power Bank and experiencing charging issues with your Mi Band, you will have to get another Power Bank. I got myself an EC Technology  22400mAh power bank and I use it to charge most of my devices including the Mi Band.


    download now

    Read More

    Wednesday, August 31, 2016

    Fixed Zenfone 2 stuck in recovery after wipe cache partition

    Fixed Zenfone 2 stuck in recovery after wipe cache partition


     Zenfone 2 recovery mode

    Today I decided to wipe the cache partition of my Zenfone 2 because it was getting too slow. I thought this was going to be straightforward process but I would soon be proven wrong. Because the wiping was taking too long, I switched off my Zenfone 2 midway into wiping cache partition. When I switched it back on it would not boot. Instead, it  got stuck in fastboot and just showed a green sleeping(Dead) Android logo with an error! message. The error message kept flashing constantly and nothing would happen when I tried to enter the recovery by the usual method of pressing power + volume up at the same time and then releasing it. I thought it was just a minor bug that I could easily fix switching off and rebooting into recovery. Again, I just got a dead Android and couldn’t access the recovery options. However, since I could still boot into fastboot, I knew all hope wasn’t lost. Finally I was able to fix the problem by connecting the phone to my PC and running some Fastboot commands. If you are having this problem of a dead Zenfone 2 after using the wipe cache partition option in the recovery, here is how you can fix it:

    How to fix Zenfone 2 Wipe Cache Partition Recovery Error

    Zenfone 2 doesnt start (boot) after wipe cache partition


    Before you begin, I really hope you have sufficient charge on your Zenfone 2. I had about 30% left before I messed up the recovery. If you have zero charge and your phone is not able to charge, you may not be able to use the below steps.
    1. Install ADB/Fastboot drivers in your PC 
      • Note: You may have to turn off your antivirus because it may detect the adb files as a malware.
    2. Install Intel USB drivers for Android devices from here
    3. Download these stock recovery and boot images from here (not sure if you really need them)
      boot.img | droidboot.img | recovery.img
    4. Copy all of the img files to the same folder where the adb and fastboot files are located
    5. Reboot Zenfone 2 in fastboot by pressing power + volume up key (Release power button after you hear/feel the buzz). Fastboot menu is basically the first menu from which you can choose Recovery. But don’t go into recovery yet.
    6. Now connect you Zenfone 2 to your PC via USB
    7. If you have installed the USB driver, the Zenfone 2 will be detected as an Android Device
    8. Open Command Prompt and navigate to the folder where the adb and fastboot files are located
    9. Run this command- Fastboot devices which checks whether your device is detected or not
    10. Now run these commands one by one: 
      • Fastboot erase cache 
      • fastboot flash fastboot droidboot.img 
      • fastboot flash recovery recovery.img 
      • fastboot flash boot boot.img 

    Note that you will get the "permission denied" error with each of these commands. Despite the errors my Zenfone 2 was fixed because after running these commands I could finally access the recovery menu. After completing the above commands, disconnect your Zenfone 2 and then go to recovery menu by using the volume key and then pressing power key to select it. Now you will notice that the sleeping android logo with error message is no longer blinking or flashing. Press and hold power button, then (while holding power button) press Volume up key and release it and then release the power button. It should now take you to the recovery menu. If that didn’t work try this: press power button + Volume and release the buttons at the same time.


    Now you will finally see the recovery menu. Use the volume keys to highlight “Wipe Cache Partition” and this press the power button to select it. Wait till the wipe cache partition is completed. Now reboot the device and your ASUS Zenfone 2 will come back to life.

    I hope my tip will help a lot of people who are experiencing the same dead Zenfone 2 issue after wiping the cache partition. Many people who went through this problem think they have bricked their Zenfone 2 for good but as you can see it’s actually very easily fixed.

    download now

    Read More

    Friday, August 26, 2016

    Fixed Error retrieving information from server RH 01

    Fixed Error retrieving information from server RH 01


    The Error retrieving information from server. [RH-01] is a server error that mostly affects custom ROMs like Cyanogenmod. It prevents users from updating or downloading any apps from the Play Store. While it’s rare, it may also affect stock android users. For custom ROM users a simple fix is to re-flash the GAPPs package and then wipe cache partition. For others, here are the methods to fix RH-01 error in Google Play Store:

    An image showing server error [RH-01] in Google Play

    Method 1: Check date/ time

    Go to Settings >> Date & Time. If the automatic date and time + Time Zone are incorrect, you will need to manually set it. Uncheck “Automatic Date & Time” and set the correct date/time+time zone.
    Now open try downloading an app or game in the Google Play Store.


    Method 2: Clear Google Play Store Data

    1. Go to Settings >> Apps (Application Manager) >> All
    2. Scroll down and select “Google Play Store”
    3. Tap “Force Stop” >> Select “Clear Data”
    4. Again from Apps >> All >> Select “Google Service Framework”
    5. Tap “Force Stop” >> “Clear Data”
    6. Again try to download an app in the Play Store.


    Method 3: Uninstall Google Play Updates

    This is a common method to temporarily fix buggy Google Play updates by reverting the Play Store app to its factory/original version.
    1. Go to Settings >> Apps >> All
    2. Scroll down and select “Google Play Stores”
    3. Tap “Force Store” >> Select “Uninstall Updates”

    Method 4: Remove and add your Google account

    For Method 4, follow the steps on this post: Fix Google Play Error RPC-S-5 RPC-S-7


    Did any of the above methods fix “Error retrieving information from server RH-01” error message on your device? Leave us a comment and also suggest if you have a better solution.

    download now

    Read More

    Thursday, August 25, 2016

    Fixed Unfortunately Contacts has stopped Android phone error

    Fixed Unfortunately Contacts has stopped Android phone error


    The Unfortunately Contacts has stopped error is a bug affecting a lot of Android smartphones- specially Samsung devices like Galaxy S5, S4, Galaxy S6, S7, Note 4, Note 5 etc. Thus, one of the reasons for this contacts app error could be due to a Samsung Touchwiz bug. However, sometimes third party app may also interfere with the stock contacts or “people” app and lead to this error. Due to this error, users can’t open the contacts list to search, add or edit saved contacts. In the error message, the users only get the option to tap “OK” and the contacts app exits or force closes. Sometimes the error may also pop up while opening your dialer or call logs. Here are some possible methods to fix unfortunately contacts has stopped error on Android smartphones and tablets:

    Screenshot of Android error: "Unfortunately, Contacts has stopped"


    How to fix contacts app has stopped error caused by third party apps

    You may have knowingly or unknowingly granted access to your contacts to multiple third party apps. Some apps known to link with contacts app include Facebook, Facebook messenger, Google +, Twitter, Contacts+ etc. Try uninstalling each of these apps and see if that solved the problem. You may not be able to completely uninstall some apps, in that case simply uninstall updates. To uninstall updates, go to Settings >> Apps >> All >> scroll down and select the app >> Tap “Unisntall Updates”. Also, make sure you have uninstalled any third party dialer from your device along with third party address book app.

    Solution 2: Reset App Preferences 

    One of our readers, got the "contacts has stopped" error after her device received Android 6.0 marshmallow update. The problem was fixed by resetting app permissions.
    1. Go to Settings >> Apps (application manager)
    2. Tap on the three dots on the top right
    3. Tap "Reset app preferences"
    4. Optionally, also select "Reset default apps"


    Solution 3: Clearing cache and data for Contacts app.

    First make sure you sync your contacts to your Gmail account. Go to Settings >> Accounts >> Google >> Tap on your Gmail address >> Tap on “Contacts”. After your contacts is synced proceed to below steps to wipe cache from your Contacts app:
    • Go to Settings >> Apps >> All
    • Scroll down and select “Contacts” or “People”
    • Tap “Clear Data” and “Clear Cache”
    • Reboot device and see if you still get that error

    Solution 4: Deleting voicemail

    Sometimes this error pops up when you have a lot of voicemail saved on your device. Many people forget that the deleted voicemails are actually in the “deleted” voicemail folder and you need to empty it to get rid of the voicemails completely. Deleting voicemails can also solve dialer force closing issues. If you don’t know how to delete voicemail on Android, here are the methods
    • Open Google Voice app
    • Select “Voicemail” (VM)
    • Now press menu or the 3 vertical dots on the upper right
    • Tap “Delete”


    Solution 5: Change Date/Time format

    Weirdly, many Samsung Galaxy smartphone users have fixed this contacts app automatically closing issue by simply editing the time format from the date & time settings. Here is how you can do that:
    • Go to Settings >> Data & time
    • Tap on “Use 24 hour format” or uncheck it if already is
    • Now also choose a different date format

    Try opening the contacts app and dialer and check for the error.

    One of the above methods will work for most users, but if you have any other methods to fix “Unfortunately contacts has stopped error” drop a comment below.

    download now

    Read More

    Thursday, August 18, 2016

    Fixed Solved Microsoft OneDrive has stopped working error

    Fixed Solved Microsoft OneDrive has stopped working error


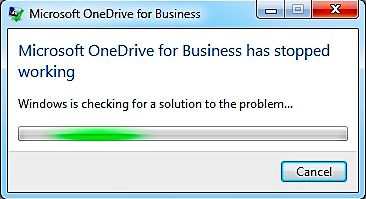
    Lately I’ve been using Microsoft OneDrive to save some of my files and folders online. OneDrive offers more storage than many other personal cloud storage services and it’s already installed in Windows 10. The app had been working great but recently I experienced an issue. While trying to sync some picture files, Office 365 documents and backup folders, I was greeted with a Microsoft OneDrive for business has stopped working error. Once this error occurs there is no way to get the app working instantly because you will only get an option to force close the program. However, there is a very easy solution that involves clearing OneDrive data from your PC. Follow the steps below to fix Microsoft OneDrive has stopped working error in Windows 10 ,Windows 8.1 or Windows 7:

    How to fix Microsoft One Drive has Stopped Windows Error


    Method 1: Restart Windows

    Simply restart your PC and then try to login to Microsoft OneDrive. If you still get the “app has stopped working” error, try the method 2 below, which has been more successful in resolving this issue.

    Method 2:Clearing Microsoft OneDrives app data

    1. First navigate to the following folder location 
      • C:UsersuserAppDataLocalMicrosoftOneDrive
        • (Tip: Quick Navigate by copying and pasting the above location to the quick access bar on the top of File explore
      • Or navigate to:
        • C:UsersyourusernameAppDataLocalMicrosoftOneDrive
    2. Empty the OneDrive folder by deleting or moving all the files and folders to another location.
    3. Now open Microsoft OneDrive again >> login with your username and password
    If you still get the error, restart Windows and try to login again. If followed the above steps correctly, the “Microsoft OneDrive has stopped working” error should now be solved/fixed. If are unable to find the AppData folder refer to the note below:

    More details about step 1 (finding the OneDrive folder):
    The “C:” could be different if you have installed your Windows OS in a different drive. Also, the “user” folder may not be there if you have your username set for your PC. Just navigate to either “user” folder or the folder with your username.

    Once inside the “user” folder, you may not see the “AppData” folder because it will be hidden. To unhide hidden folders, click the view tab (on the top right of the screen) >> on the far right click on “options” >>Change folder and search options >> click “view” tab >> Select “show hidden files, folders and drives”.

    Folder and Search options in "View" tab


    Enabling "show hidden files, folders and drives"

    Once inside the AppData folder, you can easily navigate to LocalMicrosoftOneDrive


    download now

    Read More

    Monday, August 15, 2016

    Fixed Asus Zenfone 2 NFC not working problem

    Fixed Asus Zenfone 2 NFC not working problem


    The NFC on my Zenfone 2 was working fine and easily pairing with my Bluetooth speaker and tablet. One day it suddenly stopped working. At first I thought I may have received a defective unit or that I had accidentally damanged it. I also assumed the recent firmware update disabled my NFC. However, I managed to solve this Zenfone 2 NFC issue after reading suggestions from other users in various forums. Here is how to resolve the NFC not working problem in Zenfone 2.

    How to fix ASUS Zenfone 2 NFC Stopped Working Issue

    The inside of the back cover has contacts for NFC antennas
    1. First Remove the cover and then put it back firmly in place. Make sure the cover snaps properly i.e no gaps anywhere.
    2. Now turn off NFC, Bluetooth, Wi-Fi
    3. Reboot your Zenfone 2
    4. Get your NFC device which you want to pair with the Zenfone
    5. The Zenfone 2’s NFC chip is somewhere in the middle i.e. right below the volume to rockers
    6. Gently tap the middle back of your Zenfone 2 (or the entire back) on the device you want to pair with.
      • Note: You have to tap or gently put the phone on the other device otherwise it won’t work. I use to simply slide my Zenfone on top of another NFC device and it wouldn’t pair. Also, you may have to tap all over the device several times until you find the right spot of the NFC chip.
    7. Once the NFC is detected, you should hear a notification sound followed by prompt that will show that the NFC device has connected to your Zenfone 2.

    Sometimes your Zenfone 2 can’t pair with other devices even when the NFC is working. You will hear the notification sound but it still won’t pair. In that case, you’ll have to restart your phone and then it will work. This seems to be a software bug or caused by incompatibility with some apps you installed recently. I hope ASUS will roll out an update to fix the NFC instability issue.

    If you have just put a thick protective casing on your ASUS chances are that it is the culprit. Remove the protective casing and then try to pair via NFC.

    Sometimes a damaged backpanel can also cause the issue because the inside of the backcover has the leads that contact the inner NFC antenna. Swap the backcover with a new one and check if that resolves the NFC issue.


    download now

    Read More